Showing posts with label Rustoleum. Show all posts
Showing posts with label Rustoleum. Show all posts
Sunday, November 6, 2016
Coleman Campstove 425F Refurb -Stupid Project #4
These stoves are around $100.00. I find them at Thrift stores for under $10.00.
Some sanding and new paint, goes a long way to make these stoves last forever.
Tip-You can find out how old a Coleman Stove is by looking at the numbers on the bottom of the stove.
http://amzn.to/2fIbtW2


Tuesday, October 16, 2007
The Bus- Let there be White!
I painted the interior of my bus White.
Gloss White as a matter of fact. The Gloss White is going to lighten inside.
The wood paneling and Wooden floor should really work off the gloss white.
Light and airy.
That way, when people are roasting in the back during the hot Virginia
summer, they can feel light and airy.
To paint the inside of the bus you must remove everything
and tape everything and cover everything and sand everything.
It is a tedious task.
I'm glad that the summer was over.
I would have sweated like 2 pigs in the bus.
Lots of tape, paper and plastic sheeting is needed to paint the interior.
I used my sprayer and put on 2 good coats. It was well worth it.
Here's some pictures-
 Here's what I was dealing with.
Rustoleum red primer on the floor.
The rear has already been coated with
Duplicolor Truck Bedliner. No white for this area.

 I started to cover everything. This took
a while. Over two days. Granted I only worked for about 2 hours a day on this. About 4 hours of tape and cover. Painting with the sprayer took about an hour with 2 coats. I let it dry for about 5 days.


The sprayer
is from Harbor Freight tools.
High Velocity
Low Pressure
Electric Turbine Sprayer.
$36.00 on sale.
Quiet, easy to use, no compressor needed and very little overspray.
As far as the paint- Rustoleum Gloss White- 1 pint and thinned 10% with acetone.
Drying time is slower with a 10% mix. I gave it about 5 days.

I'm ready to paint.
I had plenty of ventilation.
Doors open, out side with a slight wind,
overall, good painting weather.
Be careful. Ventilation is good and critical.
The exposed area of hair- was painted white.

Merlin was interested.

Charlie, on the other hand, couldn't
give a crap what was was going on.


I'll start insulating and installing panels later.

The white really looks better than I
had originally thought it would.
It looks cleaner, newer, better.
I'll be installing the floor in the next week or so.
I think this bus will look nice when it's
finished.
So far, so good.
Gloss White as a matter of fact. The Gloss White is going to lighten inside.
The wood paneling and Wooden floor should really work off the gloss white.
Light and airy.
That way, when people are roasting in the back during the hot Virginia
summer, they can feel light and airy.
To paint the inside of the bus you must remove everything
and tape everything and cover everything and sand everything.
It is a tedious task.
I'm glad that the summer was over.
I would have sweated like 2 pigs in the bus.
Lots of tape, paper and plastic sheeting is needed to paint the interior.
I used my sprayer and put on 2 good coats. It was well worth it.
Here's some pictures-
 Here's what I was dealing with.
Rustoleum red primer on the floor.
The rear has already been coated with
Duplicolor Truck Bedliner. No white for this area.

 I started to cover everything. This took
a while. Over two days. Granted I only worked for about 2 hours a day on this. About 4 hours of tape and cover. Painting with the sprayer took about an hour with 2 coats. I let it dry for about 5 days.


The sprayer
is from Harbor Freight tools.
High Velocity
Low Pressure
Electric Turbine Sprayer.
$36.00 on sale.
Quiet, easy to use, no compressor needed and very little overspray.
As far as the paint- Rustoleum Gloss White- 1 pint and thinned 10% with acetone.
Drying time is slower with a 10% mix. I gave it about 5 days.

I'm ready to paint.
I had plenty of ventilation.
Doors open, out side with a slight wind,
overall, good painting weather.
Be careful. Ventilation is good and critical.
The exposed area of hair- was painted white.

Merlin was interested.

Charlie, on the other hand, couldn't
give a crap what was was going on.


I'll start insulating and installing panels later.

The white really looks better than I
had originally thought it would.
It looks cleaner, newer, better.
I'll be installing the floor in the next week or so.
I think this bus will look nice when it's
finished.
So far, so good.
Sunday, September 2, 2007
BUS- The Blue Goose ain't Blue! Part 3
So after fixing some spots, I needed to paint the roof.
The roof looked much worse than it actually was.
Sand till smooth and then paint.
That was the plan.
Before I actually painted the roof,

The sanding didn't take nearly as long as I thought it would.


I used my handy Makita Sander and after I rolled the paint,
I added one more coat and I let it set.
Two coats of fine quality Rustoleum Gloss White- thinned by acetone at 20%.
I bought some spare parts that need to be installed.
They'll make the bus look much better.
The roof looked much worse than it actually was.
Sand till smooth and then paint.
That was the plan.
Before I actually painted the roof,
I repainted the red.

The sanding didn't take nearly as long as I thought it would.


I added one more coat and I let it set.
Two coats of fine quality Rustoleum Gloss White- thinned by acetone at 20%.
I bought some spare parts that need to be installed.
They'll make the bus look much better.
Sunday, June 24, 2007
BUS- Do it yourself truck bed liner pictures.
In earlier posts, I had sanded, primered and painted the floor areas of my 1977 VW Bus.
Duplicolor make paint products and also makes a
Do it yourself truck bed liner / undercoat.
Truck bed liner- dries to a protective, hard covering.
Designed to be applied to areas where protection is needed- mainly truck bed liners.
It can be applied anywhere paint can be used, it has many uses.
I decided to use the truck bed liner on the floor of my bus, to protect, seal and insulate the floor.
I assume some level of additional structural integrity will occur.
It also is flexible and that will lend to insulation.
The floor will eventually be hardwood.
The hardwood floor will go nicely with wooden interior panels.
Here's some pictures of the truck bed liner in my bus.
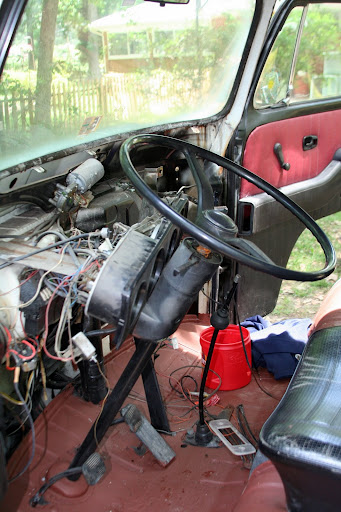
The front cab floor was sanded, and primered with Rustoleum Stop Rust primer paint.
Some images have text.
Click for larger images.
I also sanded and primered the rear cargo area.
I used Rustoleum as well.
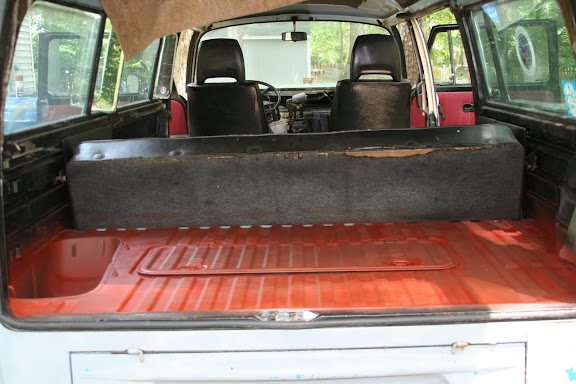
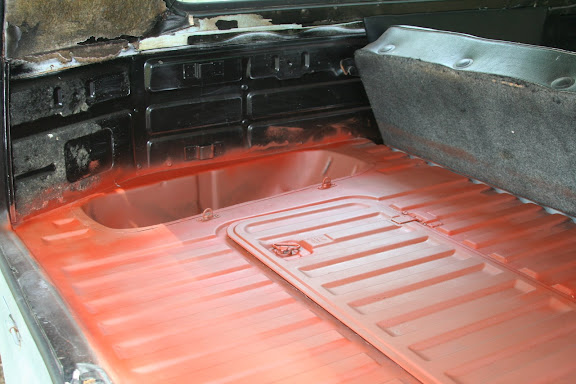
If you decide to use a Truck bed liner or an Undercoating product,
after the area has been sanded and primered, you have to sand
the area to be treated again. The truck/undercoat needs a "tooth,"
for the product to correctly adhere to.
Rough it up with a light sanding.
If the prepared area has any sheen or is shiny, rough it- using a fine grit sand paper
or a 3m red scuff pad. No sheen/shiny is good.
Your preparation should take longer than actually applying the product.
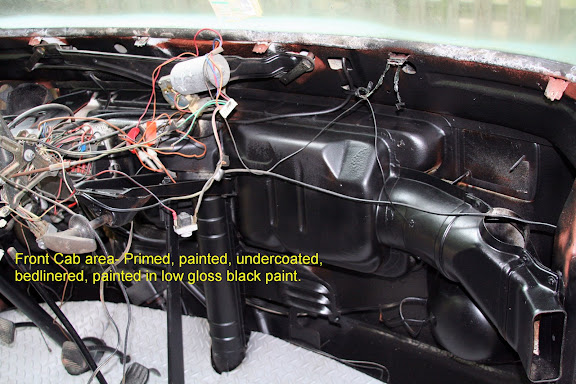
I got carried away and decided to do the front cab wall as well.
Insulation will be applied
to make the bus quiet and warm.
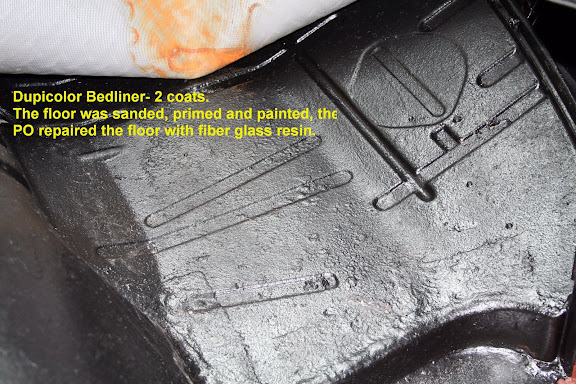
The fiberglass patch was there
when I got the bus. I'll leave it for now.
I decided to go thin with the coats.
I wasn't sure if I would like the results.
It would easier to remove thin coats, versus
a thick coat. You can add coats later.
I may do that.
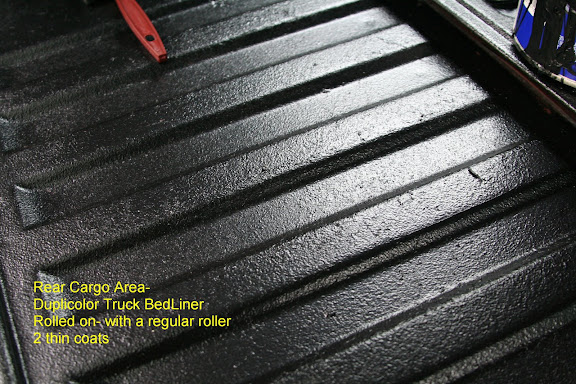
It should be noted that I did not use the kit that's available. I bought a pint of the actual bed liner ($16.00) and a regular paint roller. I also used a regular paint roller sleeve. The foam roller style will disintegrate on use. I did use a foam touch-up brush to reach those hard to reach areas.
NOTE: wear gloves, this stuff is very hard to get off. It dries quickly, so working fast is good.
Be ready.
Duplicolor make paint products and also makes a
Do it yourself truck bed liner / undercoat.
Truck bed liner- dries to a protective, hard covering.
Designed to be applied to areas where protection is needed- mainly truck bed liners.
It can be applied anywhere paint can be used, it has many uses.
I decided to use the truck bed liner on the floor of my bus, to protect, seal and insulate the floor.
I assume some level of additional structural integrity will occur.
It also is flexible and that will lend to insulation.
The floor will eventually be hardwood.
The hardwood floor will go nicely with wooden interior panels.
Here's some pictures of the truck bed liner in my bus.
The front cab floor was sanded, and primered with Rustoleum Stop Rust primer paint.
Some images have text.
Click for larger images.
I also sanded and primered the rear cargo area.
I used Rustoleum as well.
If you decide to use a Truck bed liner or an Undercoating product,
after the area has been sanded and primered, you have to sand
the area to be treated again. The truck/undercoat needs a "tooth,"
for the product to correctly adhere to.
Rough it up with a light sanding.
If the prepared area has any sheen or is shiny, rough it- using a fine grit sand paper
or a 3m red scuff pad. No sheen/shiny is good.
Your preparation should take longer than actually applying the product.
I got carried away and decided to do the front cab wall as well.
Insulation will be applied
to make the bus quiet and warm.
The fiberglass patch was there
when I got the bus. I'll leave it for now.
I decided to go thin with the coats.
I wasn't sure if I would like the results.
It would easier to remove thin coats, versus
a thick coat. You can add coats later.
I may do that.
It should be noted that I did not use the kit that's available. I bought a pint of the actual bed liner ($16.00) and a regular paint roller. I also used a regular paint roller sleeve. The foam roller style will disintegrate on use. I did use a foam touch-up brush to reach those hard to reach areas.
NOTE: wear gloves, this stuff is very hard to get off. It dries quickly, so working fast is good.
Be ready.
Saturday, June 2, 2007
Time to make my list. The bus needs a new interior.
I decided to take a trip with my girls to Lowe's.
Lowe's Home Improvement has everything. I prefer Lowe's over Home Depot.
I like the way Lowe's is laid out.
You can find things in areas that make sense.
I don't like having to walk from one side of the store to the other.
The people who work at Lowe's are nicer and more helpful.
The goal was to figure out what the interior was going to look like.
Also to determine what materials I would need to start the interior.
I made the decision to make the bus interior out of wood.
The bus will have a Surf Woody Bus feel to it.
Wood panels, curtains, a simple floor plan.
This was a fact finding mission, and a good way to kill a couple of hours.
Here's Some Pictures-
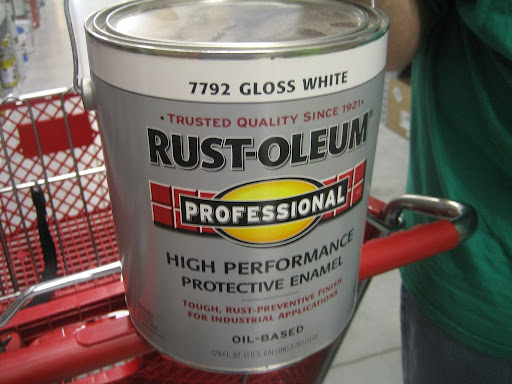
The paint scheme for the bus is going to be
tow tone white over red. I may paint the bus my self. There's an interesting website where a gentleman painted his Corvair for $50.00.
I believe it's called the $50. Dollar paint job.
He used rollers and thinned the paint.
He layered many coats and wet sanded.
It does not look that bad.
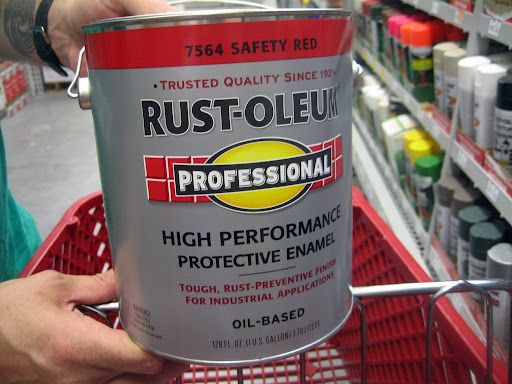
This red paint is great.
The shade is familiar.
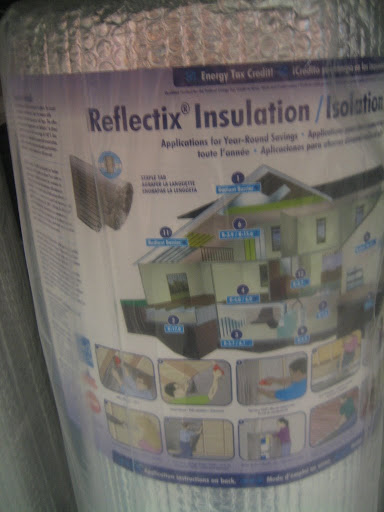
Most VW Buses don't really have insulation. The interior of the bus needs to be insulated. The trick is to not use anything that will cause problems later on. I'm going to use the foil backed insulation in the interior voids in the rear of the bus. I'll also use the pink Styrofoam stuff
as was done earlier. The bus needs to be warm and quiet.
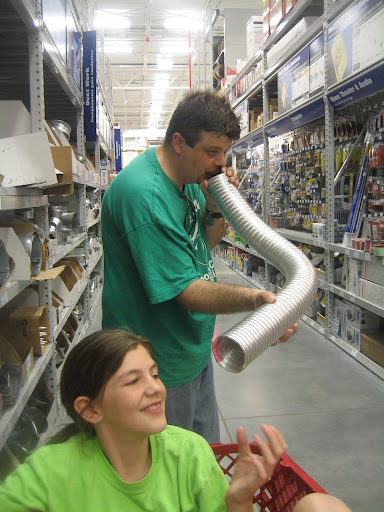
I don't know what this thing is, but it scared
her. It conducts loud goofy noises very well.
My youngest was slightly amused.
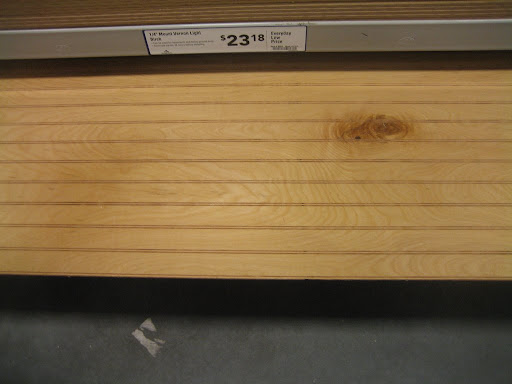
The interior panels may be this type of panel.
I like the pine and wood grain.
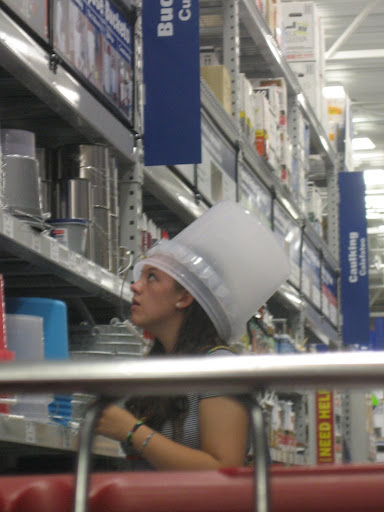
Buckets have many uses.
My oldest.
She's eyeing that steel
bucket. Why, I don't know.
The floor will be wood flooring. Wood panels, and floor.
Surf Woody Bus. It will be nice.
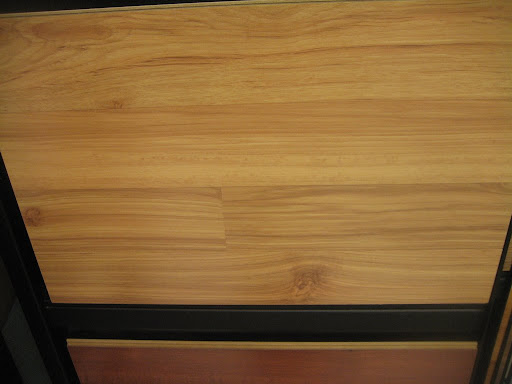
The trip was productive. I know what the
interior will be like. I have a rough idea of
I'm going for. More later.
Lowe's Home Improvement has everything. I prefer Lowe's over Home Depot.
I like the way Lowe's is laid out.
You can find things in areas that make sense.
I don't like having to walk from one side of the store to the other.
The people who work at Lowe's are nicer and more helpful.
The goal was to figure out what the interior was going to look like.
Also to determine what materials I would need to start the interior.
I made the decision to make the bus interior out of wood.
The bus will have a Surf Woody Bus feel to it.
Wood panels, curtains, a simple floor plan.
This was a fact finding mission, and a good way to kill a couple of hours.
Here's Some Pictures-
The paint scheme for the bus is going to be
tow tone white over red. I may paint the bus my self. There's an interesting website where a gentleman painted his Corvair for $50.00.
I believe it's called the $50. Dollar paint job.
He used rollers and thinned the paint.
He layered many coats and wet sanded.
It does not look that bad.
This red paint is great.
The shade is familiar.
Most VW Buses don't really have insulation. The interior of the bus needs to be insulated. The trick is to not use anything that will cause problems later on. I'm going to use the foil backed insulation in the interior voids in the rear of the bus. I'll also use the pink Styrofoam stuff
as was done earlier. The bus needs to be warm and quiet.
I don't know what this thing is, but it scared
her. It conducts loud goofy noises very well.
My youngest was slightly amused.
The interior panels may be this type of panel.
I like the pine and wood grain.
Buckets have many uses.
My oldest.
She's eyeing that steel
bucket. Why, I don't know.
The floor will be wood flooring. Wood panels, and floor.
Surf Woody Bus. It will be nice.
The trip was productive. I know what the
interior will be like. I have a rough idea of
I'm going for. More later.
Subscribe to:
Posts (Atom)