This weekend was full of progress.
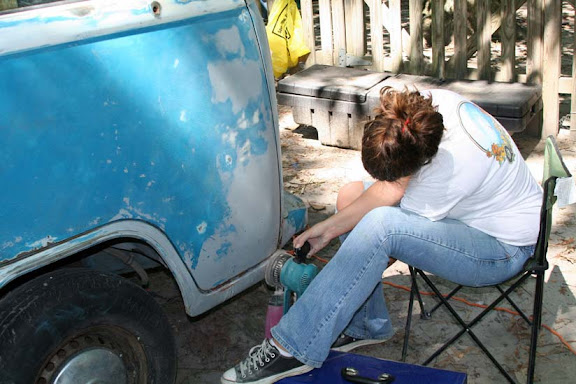
It was time to do some serious sanding.
My Pop hooked me up with a very nice Makita Sander.
Variable speed, catch bag, 6 1/2 inch sanding pad. Works very well.
I also had some help. I worked my daughter's this weekend. They'll
be sore on Monday. They really helped me out.
We went to Harbor Freight tools and picked up some sand paper and a
High velocity Low Pressure Turbine paint sprayer. On Sale for 34.00 bucks.
If your wondering- it works pretty good. I decide to NOT use air and a professional rig.
I decided to NOT use automotive paint. I decide to NOT have it professionally painted.
Money being the main reason behind the choices to NOT do the above. The $50.00 dollar
paint job website, was a big influence behind using the HVLP Sprayer.
The website shows how a dude painted his Corvair with a roller and Rustoleum Oil Based paint.
The Corvair looked good and the idea has promise. I modified the idea to include the sprayer, and so far I've spent about $80.00 so far.
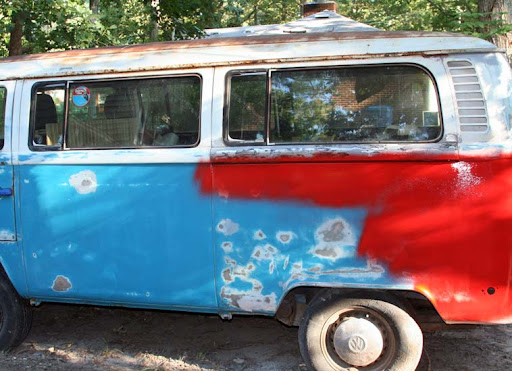
After sanding and body work- I gave the sprayer a try.
Over all not bad. The pictures are of ONE coat of paint.
As more coats are applied, I'll post pictures. So far so Good!
I'm excited.
Here's
s
o

m
e Pictures.
Britt's working hard.

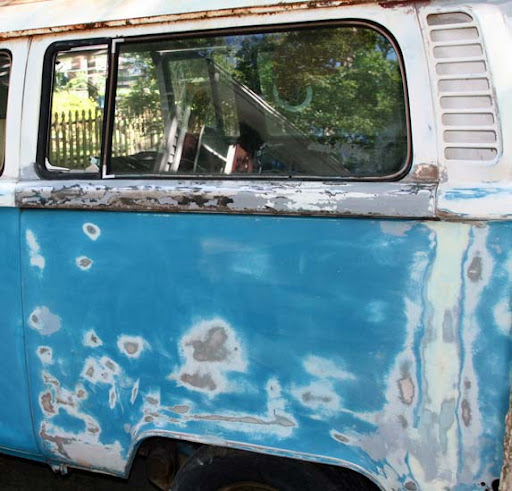
Lot's of Bus to Sand.
Kait and Coralyn sanding and working hard.
After the sanding was done.
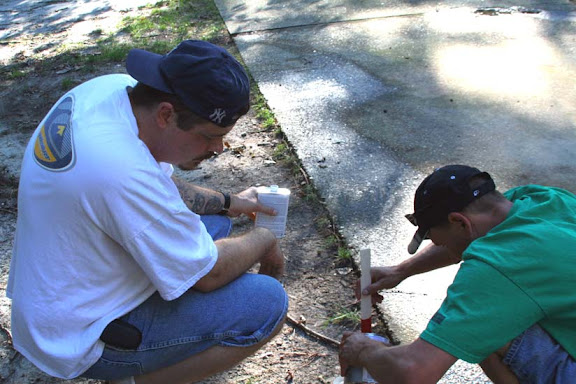
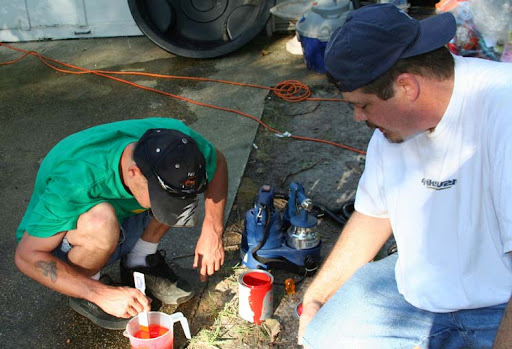
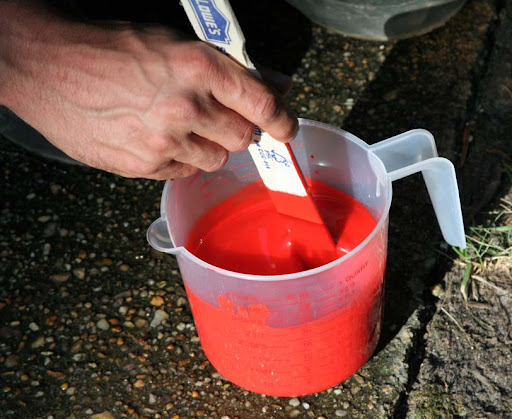
Me and Scott speculated on the best way to mix the paint. Scott's mixing the paint. Thank's Scott.
We went with a 33% reduction using acetone. Acetone will thin the Rustoleum. It will allow the paint to dry and harden faster.
Good ole' Dollar store measuring cup.
Lowes paint stick. Big fan of Lowes.
Here's the paint by the way-
Safety Red Gloss.
Very Red.
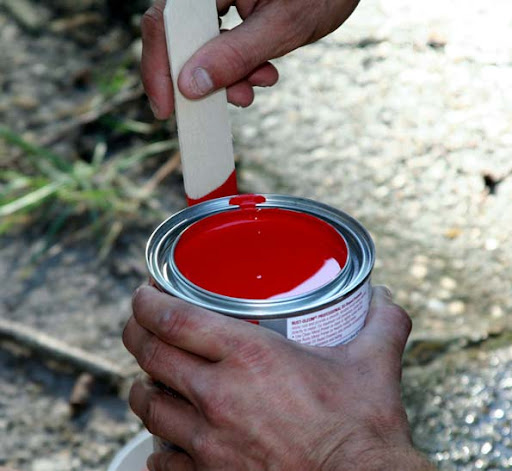
RED....IS...Good.
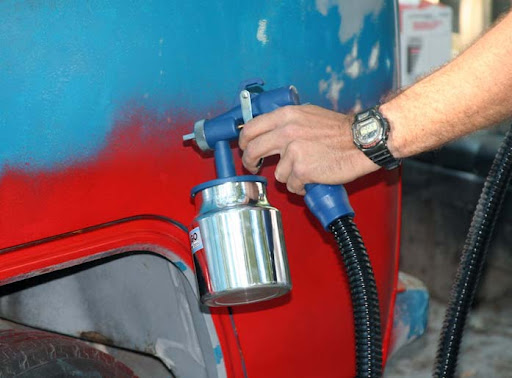
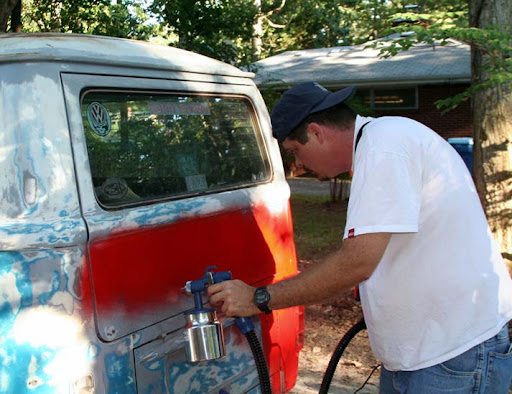
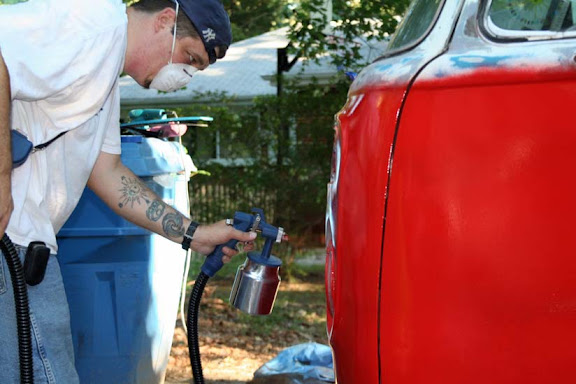
Once the spraying started there was little turning back.
The spray pattern is adjustable along with the volume. The paint mix was 33% thinned and was fine with the paint.
The paint spray was pretty bad, or so I thought.
It looked like orange peel. It started to lay smooth and I was relieved.
Once the pattern was adjusted- the paint was smooth and laid very nicely.
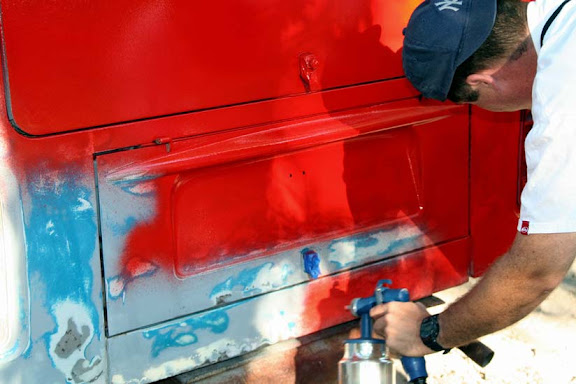
I needed to lay a thick coat to start.
I was about 8 inches away. Very little over spray. I'll do about 7 coats total.
I'll do these over about a week.
Paint.
I thought I had to work fast.
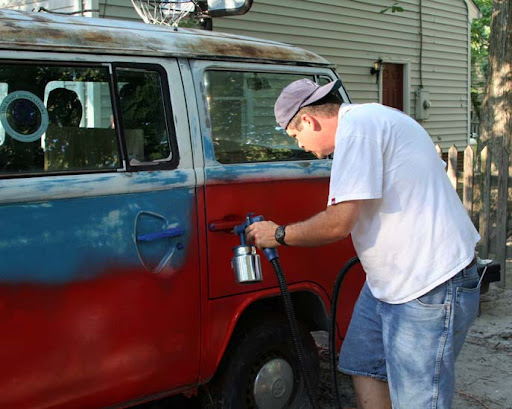
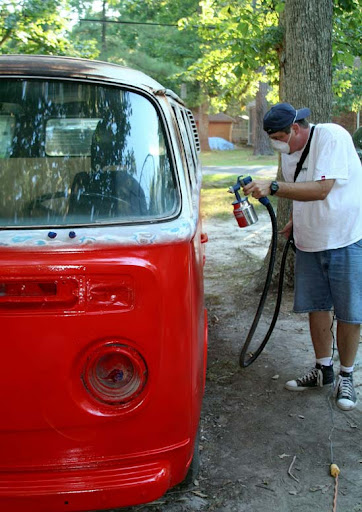
As the top will be white, and needs to be sanded, I decided not to tape up the top. I found that I could take my time.
The painting process got better.
This side will look better than the other. This is only the first coat.
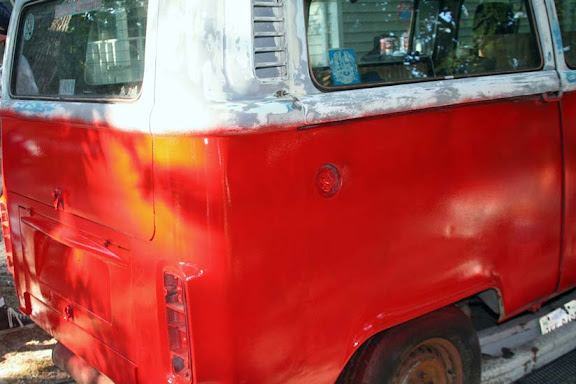
The bad thing about my choice of paint- It shows the all the dings and dents that you miss. These will be fixed. The orange in the picture is the Sun's reflection.
I worked my way around the Bus.
I used one pint of paint. I think two more will suffice. The red should tone down some. Today was a perfect day for painting.
I was able to go around and cover some thin spots.
The HVLP spray rig from Harbor Freight, it neat. It has a long hose for reach and a shoulder strap. You walk around with the turbine sounding like a vacuum cleaner. The blower unit heats up a little. The air going through the gun gets slightly warm.
I added slightly more acetone to compensate. From my pictures
here I need to keep the gun more level. I'll do that next time.

SO far I'm impressed.
I like the sprayer. I like the paint.
I like the idea of having a new coat of protective paint. I like the red.
One coat of paint and the bus doesn't look bad. It will be very good when I'm finished with the extra coats and wet sanding. Over all the paint job will be decent but not excellent.
I'll post more pictures during the process. So far I'm happy...
Can't wait to get this bus on the road.


